While live bait such as fish and fish eggs are irresistible to fish, they can be almost impossible to attach to a hook. The egg loop knot comes in pretty handy for this.
It can be tied to a leader so that it can accommodate the slippery bait. Also known as the bumper knot, the egg knot is ideal for anglers who prefer to catch salmon and steelhead trout.
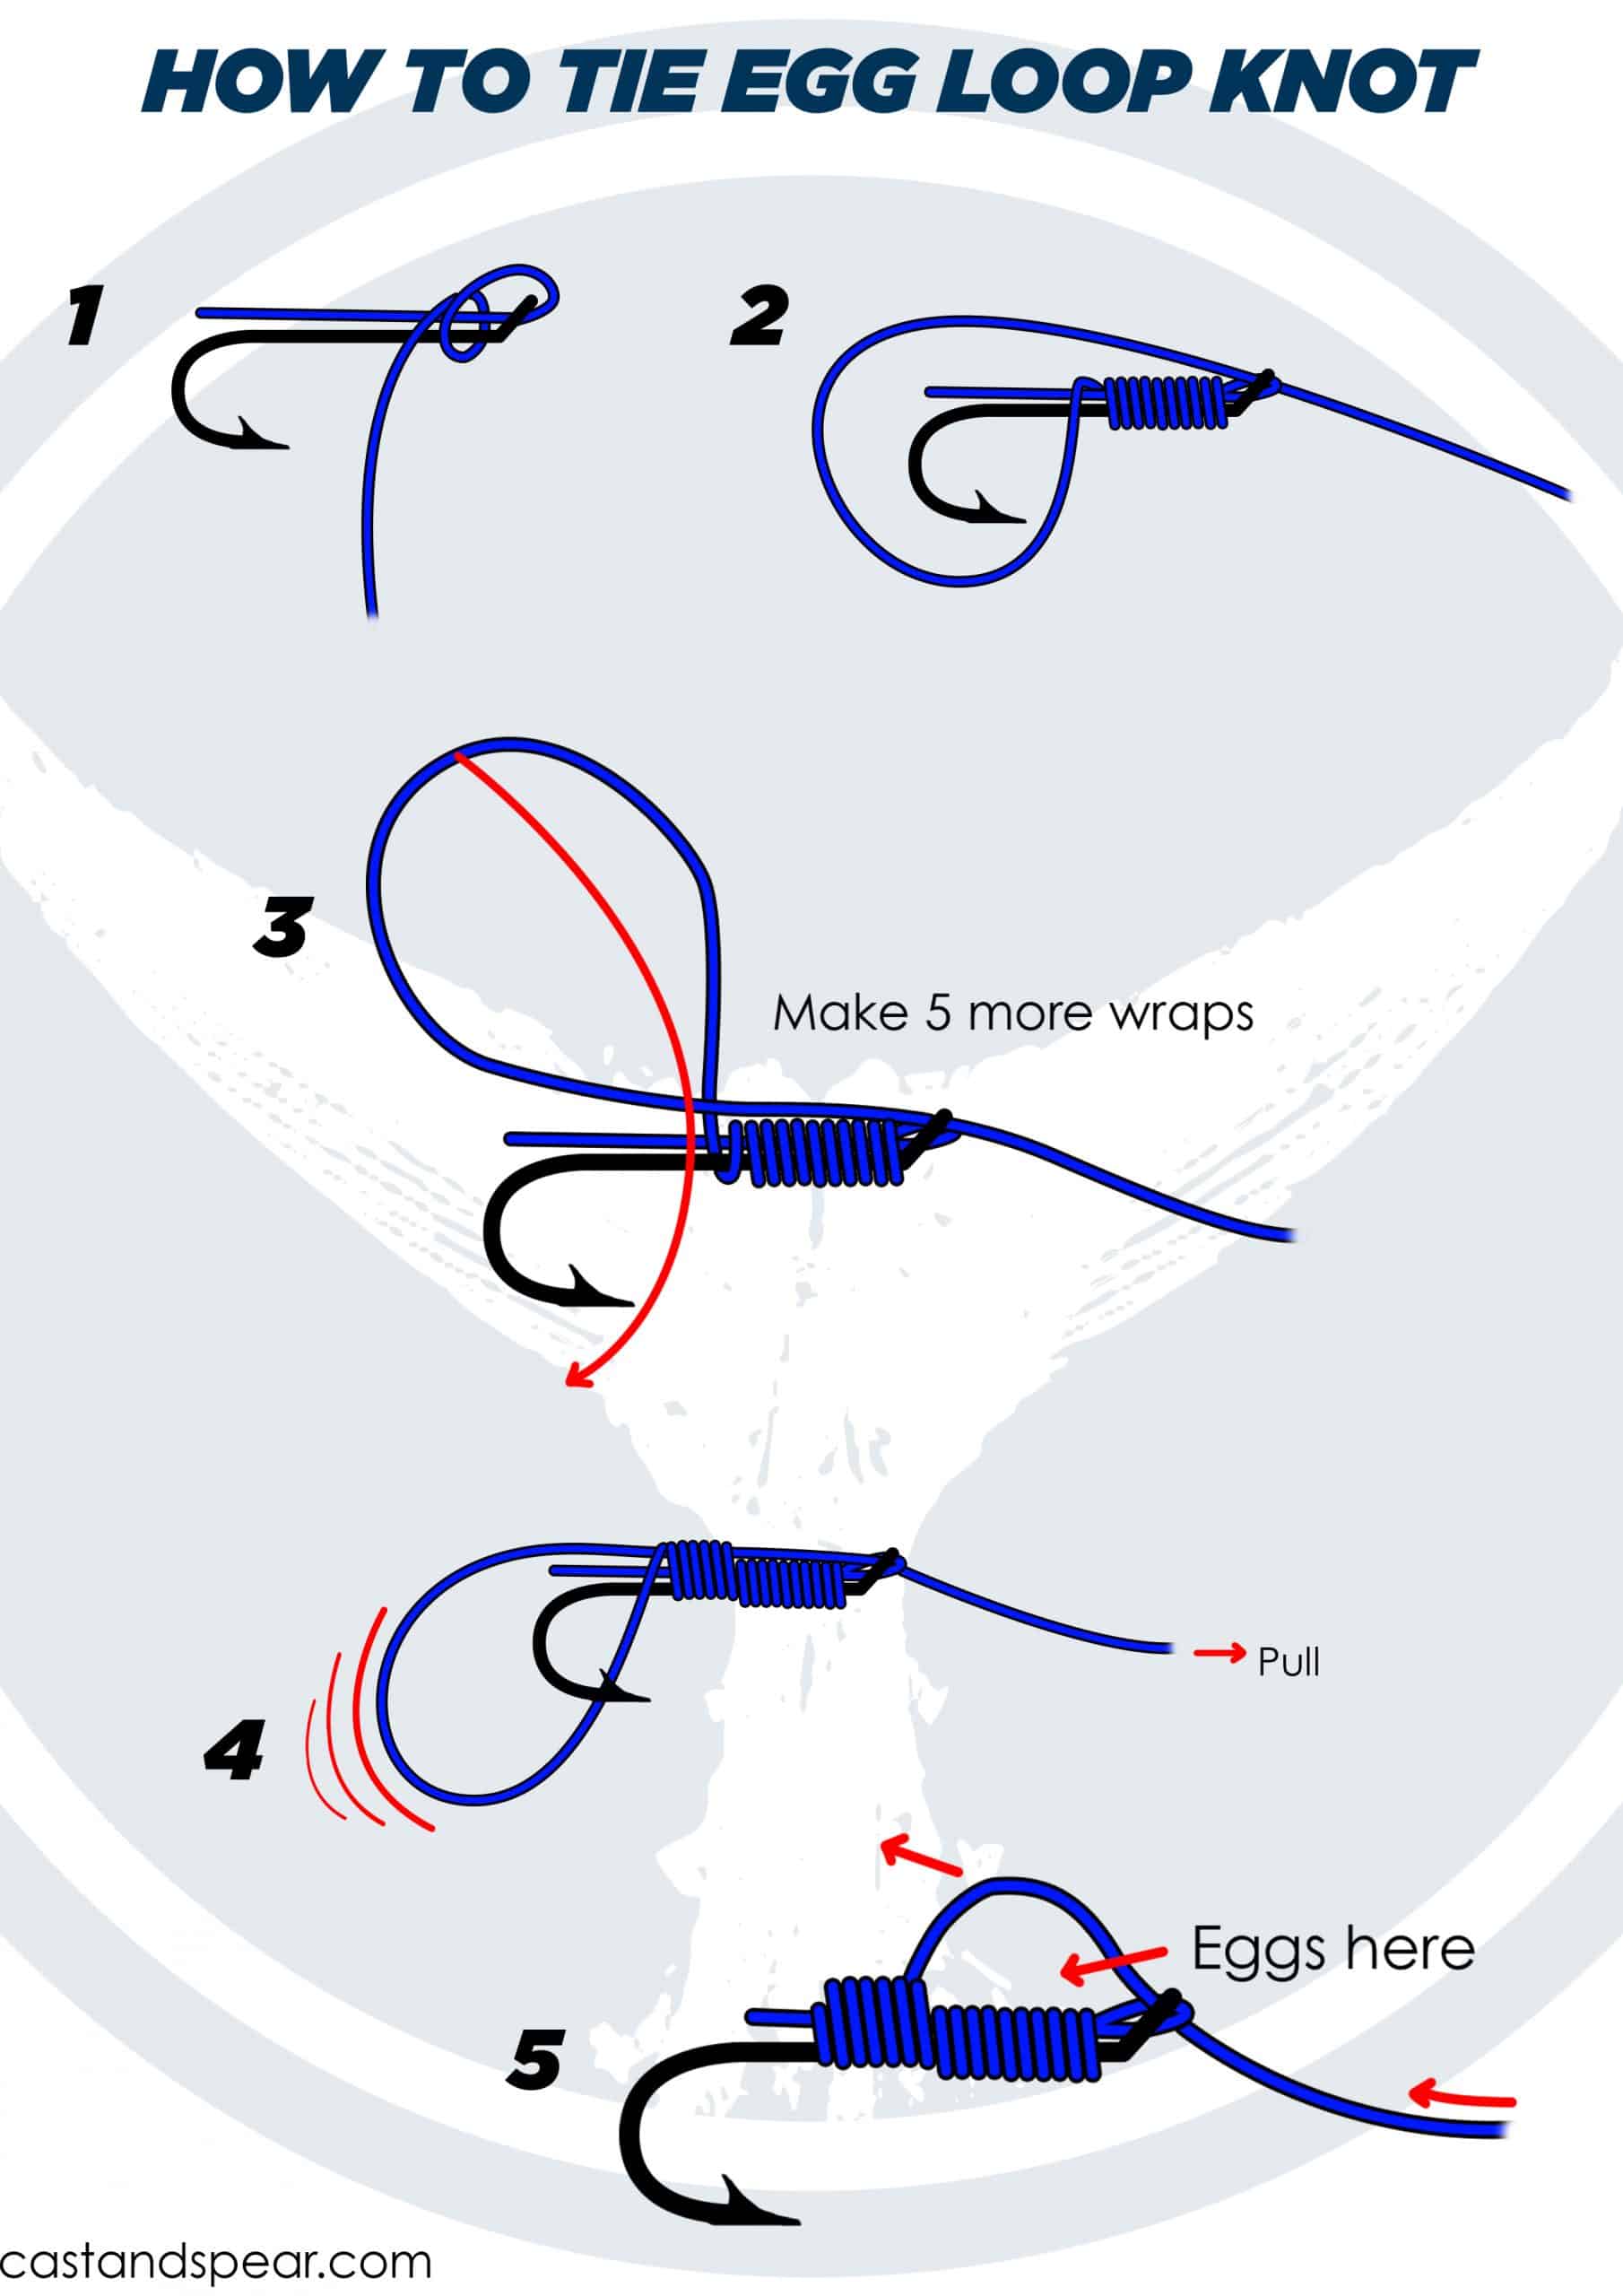
Tying the Egg Loop Knot

- Take the end of the rope through the hook eye.
- Wrap it around the hook and standing line 3 times.
- Then wrap it nine more times before passing it through the loop.
- Then take the loop that is formed upward and wrap it around the standing part.
- Then wrap it five more times before holding and pulling the longer end to make it tight.
- Then pull the rope up to make a gap and place the egg inside to secure it.

Tips
- To form the last loop, you may have to push the leader a bit back through the eye of the hook.
- You can also use the knot to tie the mainline to the hook directly.
- Make sure that you maintain steady pressure when you are tying this knot. This will prevent the line from overlapping and unraveling when you are using it.
- Make sure the line is cinched to make the knot correctly.
- Reverse the process if you are left-handed.
- Take your time tying this knot, or the wraps will unravel. If they do, start again, or the knot will loosen in the water, and you will lose your bait.
- The best way to perfect this loop knot is by practicing. Different anglers have different ways of maintaining pressure on the line while they are tying it. You need to find yours by making this loop knot as many times as possible.
- Before starting, make sure that you have at least 4 feet of line to work with. This will give you a 4 feet long leader.
- Make sure that the barbed end of the hook is facing down between your thumb and forefinger to prevent injury.
- If the first turn is tight, you should not have trouble making the rest, especially if you maintain steady pressure.
Advantages
- It provides a hold for slippery bait and is considered to be one of the best salmon and steelhead fishing knots.
- Use the knot to hold eggs, shrimp, and fish roe into place.
Disadvantages
- It can be challenging to tie without practice.
- The loop can unravel quickly if it is not tied correctly.
Uses
- The egg loop knot is typically used for steelhead and salmon fishing because of its sturdiness.
Alternatives
- Double Egg Loop Knot – If you want to attach a puffball or other round artificial lures to the line, use the double loop egg knot. To make this pass, a double through the eye of the hook rather than a single rope. That is how to tie a double egg loop knot.
- Double Hook Egg Loop Knot – If you want to keep your hook and bait apart in the water, use the double hook egg loop knot. Just leave a long tag end while tying this knot and attach another hook to it. The first one can hold your bait, while the second can snag the fish.
- Nail Knot – This knot is handy for tying a nail knot onto a fly line and can also be used to connect backing and a leader to a fly line.
- Loop To Loop Knot – This is not a knot but a method of connecting two interconnecting loops and is considered to be quite strong.
Frequently Asked Questions
Q: How do I make an egg loop knot stronger?
A: Make your egg loop knot stronger by placing more turns in the line when you are tying it.
Q: What is another name for the egg loop knot?
A: This loop knot is also called the Bumper knot, and it is considered to be a modification of the Snell knot.
Q: How do I maintain control over the turns when I tie this knot?
A: Keep steady pressure on the hook and line, and you will be able to maintain control of the turns.
Q: When should I tie the egg loop knot?
A: Tie a couple of these loop knots while you are on your way to your fishing spot. That way, you will spend less time prepping and more time on your favorite activity.
 Founder & Angler

 Facebook
 YouTube


