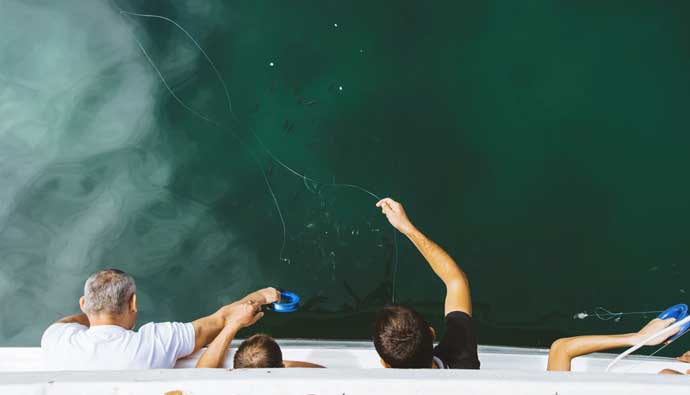
Fishing is a relaxing activity, and using a bobber can help you relax even better. I bet you have seen others using a bobber or a float while fishing. Bobbers or floats are pretty exciting. They give a small bob on the water’s surface when you are about to catch your fish.
A bobber is a small buoyant device used to suspend the fishing hooks and bait at the desired depth in water. It fills with air and pops to the water surfaces as the fish takes its bait.
Here is a deeper dive into how bobbers work and how you put them to your fishing line. But first, let’s look at the various types of bobbers.

What Are the Different Types of Bobbers?
Every angler needs to know the different types of fishing tools available. Bobbers come in different shapes and sizes depending on their use. You can have colored or transparent bobbers, especially during deep-water fishing.
Here are the different types of bobber floats:
Cigar Floats
Cigar floats are weighted at one end of the bobber, giving them a vertical appearance in different conditions. It works great with large bait and is used for catching large fish.
Pencil Style Bobber
A Pencil bobber is very sensitive. Pencil bobbers are ideal when using small baits and are often used in fly fishing.
Bubble Floats
Bubble floats are used in water that is rushing inside. The bobber emerges on the water surfaces when a fish bites the bait. They are hollow inside and can be left barren or filled with water. They easily control their weight, making them versatile for different fishing methods.
Slip Bobber Floats
Slip bobbers not only move the whole distance to the terminal of your fishing pole but can also help control the length at which you drop your bait. They have a small hole in the middle for the line to slide through.
When the fish bites the bait, it either moves on the surface or goes underwater. It is one of the most complex bobbers to attach your line, but you will easily catch on with a few tries.
Spring Slip Bobbers
Also known as spring floats, spring slips are functional in two modes. They can either be a fixed bobber or slid. The fixed mode is excellent for shallow waters, while the sliding mode is ideal for deep-sea fishing.
The sliding function is often compared to the traditional slip bobber. Spring slips are slightly pricier than other bobbers since you get a two-in-one bobber. It is an excellent option for anglers who do not wish to be confined to one float type.
Popping Cork
The popping cork bobber is made of a cork. It makes a popping noise when the fish takes a bite off it. You must start reeling your fishing line and fish in when you hear the sound. These floats are pretty effective, but getting used to their work might take a while.
Round Fixed Bobbers
These are considered the best bobber floats for beginners since they are believed to be the easiest to work with. You must ensure that the bobber’s size matches the fish you are fishing for. If you get a large bobber for smaller fish, they might struggle to catch the bobber float.
Balloons
Balloons are used to catch big fish since you can easily control their depth. The positioning is deep in the water, so you will easily see you have made a catch before you feel it.
You can get balloon bobbers from the store or use regular balloons. However, if there is a strong current, it is harder to distinguish whether you have a catch or the balloon is moving purely because of the weather.
Eagle Claw
The bobber flats look like an eagle’s claw. They are hypersensitive when fish strikes and are great for catching small fish. Eagle claw bobbers also cost a little more than other bobber types.
How to Put a Bobber Float on a Fishing Line?
Putting the bobber on a fishing line depends on whether you use a slip fishing or a fixed fishing bobber. Before attaching either of the two bobbers, you must first determine the depth you would like your bait and lay out your line on the determined length.
Here is a look at how to install the different types of bobbers.
Fixed Fishing Bobber Floats
Fixed bobbers are great for a beginner since they are easy to install and use. They also take away the worry of your fishing line tangling. Here is how to use them:
Step 1: Simply depress the button on top of the bobber and reveal.
Step 2: Tie the line on the clip and lay it along the bobber.
Step 3: Press the top button to release the second clip. Clip your line into the second clip as well.
Once you are done with the steps above, the bobber float should now be fully secured without the worry of lines becoming detangled.
Spring Bobber Floats
These are for the more experienced anglers who are up for a challenge. Here is how to install it to your spring fishing bobbers:
Step 1: Install your bobber stopper to your line. You can use needlenose pliers if you find it hard to use your hands. Thread it over the end of the line to hold the fish bait in place.
Step 2: You can choose whether to attach the fishing bead next or not. However, you risk the bobber stopper from slipping through the bobber.
Step 3: Attach the bobber by threading the fishing line through the small hole in the middle. Slip bobbers often move around, and you can add a rubber bobber stop at your line.
Step 4: Attach a sliding weight to your bobbers. You want a heavy weight to keep the bobber afloat and not too heavy to submerge.
Step 5: Set up the swivel
Step 6: Add your bait and go fishing.
Step 7: Remember to cut off the excess line that often hangs from the hook when done, and use the hook size and rod meant for the fishing you are catching.
What Factor Should I Consider When Choosing Where to Put the Bobber Float?
The Type of Fish
The type of fish will determine where you put your bobber on your fishing lines. If you are trying to catch a bottom-feeding fish, you must put your bobber close to the bottom of the water. Other examples of bottom-feeding panfish include Trout, Eels, Carp, Flatfish, and Sturgeons.
If you want to catch fish that swim near the top of the water, you will need to put the bobber up on the water. Top-feeding fish include bass, trough, Walleye, Current, and Pike.
The Distance
The general rule is to put your fishing line about 18 inches above the hook. This will ensure that the bait is presented at the proper depth to attract the fish quickly.
Water Current and Depth
The water current and the depth also affect where you place your bobber. Place the bobber close to the bait if you are fishing in shallow water. If you are in deep waters, place the bobber higher up.
If there is a strong water current, place the bobber closer to the bait to ensure it does not get swept away.
Related Questions (FAQs)
What Is a Bobber Made of?
Bobbers are made of different materials, including plastic, cork, and wood. Corks are, however, the most popular material used in making bobbers. It is buoyant and lightweight, making it great for suspending bait in the water.
Bobber floats are also often made of plastic since they are much cheaper than cork and can easily be molded in different shapes and sizes. Wood, on the other hand, is heavier than plastic or cork; hence used, in deeper water.
What Are the Benefits of Using a Bobber?
Using a bobber comes with different benefits. Some of them include:
- It keeps the line from tangling
- Ideal for fly fishing.
- It helps keep the fish bait at the desired depth
- It helps keep the bait in place and catch more fish
- It keeps the fisherman alert when fishing.
What Are the Drawbacks of Using a Bobber Floats?
Some people have found it challenging to use bobber floats. Some of the drawbacks of using bobbers include:
- They are often difficult to reel in and cast
- They often get caught in debris or plants
What Is the Alternative to Using a Bobber?
You can use a sinker if you do not have a bobber. A sinker is a weight placed on the fishing line and helps keep the bait at the desired length.
Sinkers often come in different weights and sizes. The weight and size you go for are determined by the depth of water and the size of fish you want to catch.
Conclusion
We have only provided a simple guideline on where to place your bobber float. The best way to determine what works for you is to experiment in different situations and see what works for you.
You can also speak to local anglers or fly fishing enthusiasts to know what works best for them. However, you now know how to use a fishing bobber and can start using one today.
 Fishing Expert
  Facebook
 YouTube