Have you ever wondered why the Knotless Knot is so popular among fishing enthusiasts? Understanding how to tie this knot is crucial, especially if you’re into carp and catfish fishing. This article will guide you through the intricacies of the Knotless Knot, its benefits, and how to tie it correctly.

The Knotless Knot, a type of snell knot, has gained significant popularity due to its unique properties. It allows for a longer tag end, which is particularly useful for securing softer dough baits. When tied correctly, it also has self-hooking properties, making it a favorite among anglers.
Knowing when and how to use different types of knots can be the difference between a successful catch and a missed opportunity. The Knotless Knot is often used in situations where a strong, reliable knot is required.
Some anglers argue that other knots, such as the Snell Knot or the Egg Loop Knot, offer similar benefits and may be easier to tie for beginners. Despite this, the Knotless Knot continues to hold its own, thanks to its versatility and effectiveness in a variety of fishing scenarios.
How to Tie the Knotless Knot
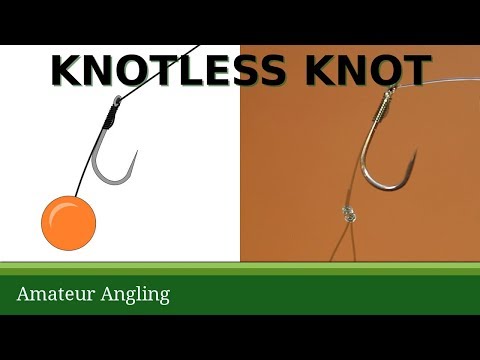
- Hold your hook with the point furthest away from you.
- Place the line through the eye and pinch against the hook.
- Wrap the long end with 5-10 wraps.
- Fish the line back through the same side of the hook eye.
- Pull the tag end and the main line in opposite directions to lock in the knot.
- With the tag end, tie an overhand knot or perfection loop.
Why Use a Knotless Knot?

Now, you might be asking, “Why should I use a Knotless Knot?” Great question! The Knotless Knot has been gaining popularity in the fishing world and for good reasons.
Firstly, it’s excellent for specific rigs that require a hook to be snelled. This means that the Knotless Knot can be a handy tool in your fishing arsenal. Secondly, it’s known for its strength and ease of tying. Even if you’re new to fishing, you’ll find this knot relatively easy to master.
But the benefits don’t stop there. The Knotless Knot offers less friction, which can be a game-changer in certain fishing situations. Plus, it’s particularly effective in emergency situations where securing a catch is critical.
The Knotless Knot is unique because it allows for a longer tag end. This feature is particularly useful when you need to secure softer dough baits. But that’s not all! This knot is also associated with a concept known as a “hair rig.”
A “hair rig” is a technique where the bait is attached to a short piece of line that hangs from the back of the hook, rather than being mounted directly on the hook itself. This setup allows for the attachment of different baits like boilies, making your fishing experience even more versatile!
Pros and Cons of the Knotless Knot

Advantages
The Knotless Knot is not just a fancy name; it comes with a host of advantages that make it a favorite among anglers. Here are some of the key benefits:
- Great for tying hooks in series: If you’re planning on using multiple hooks, the Knotless Knot is your best friend. It allows for a seamless series of hooks, increasing your chances of a successful catch.
- Excellent for specific rigs: Some rigs require a hook to be snelled, and the Knotless Knot fits the bill perfectly. It’s versatile and adaptable, making it a go-to choice for many fishing scenarios.
- Allows for different baits: With the loop at the end of the knot behind the hook, you can attach different baits like boilies. This flexibility can be a game-changer in attracting a variety of fish.
- Self-hooking properties: A correctly tied Knotless Knot exposes the hook, allowing for self-hooking. This feature can significantly increase your success rate in catching fish.
Disadvantages
Despite its many advantages, the Knotless Knot does have a few drawbacks:
- Requires knowledge of tying a hair rig: If you don’t know how to tie a hair rig, you risk having the bait wrap around the mainline, rendering the Hair Rig useless.
- Requires enough wraps: When tying a hook, it’s crucial to do enough wraps to hold the shank. Not doing so can compromise the strength and effectiveness of the knot.
Alternatives To The Knotless Knot
While the Knotless Knot is a fantastic tool, it’s always good to have alternatives up your sleeve. Two popular alternatives are the Snell Knot and the Egg Loop Knot. Both offer unique benefits and can be used in different fishing scenarios.


Common Mistakes When Tying a Knotless Knot

Even the best knots can fail if not tied correctly. Here are some common mistakes made when tying a Knotless Knot:
- Using a frayed line: A frayed line can compromise the strength of your knot. Always ensure your line is in good condition before tying your knot.
- Not properly cinching the knot: A loose knot can easily come undone. Make sure to pull the tag end and the main line in opposite directions to lock in the knot.
- Not tying a hair rig correctly: If a hair rig is not tied correctly, there’s a risk of having the bait wrap around the mainline, rendering it useless.
Frequently Asked Questions
Create an overhand loop fishing knot, then put the tag end through the eye. Wrap the mono or thread around the shank at least five times, then fish the tag end back through the eye of the hook. Moisten and pull the loop end and the tag ends tightly to secure it in its final resting position.
You make a knotless knot by doing a series of wraps over the tag end of the line that’s resting on the shank of the hook, then locking down the other end by putting it through the eye of the hook.
Follow the fishing instructions above.
The Knotless Knot offers strength, ease of tying, and less friction. It’s particularly effective in emergency situations where securing a catch is critical. It’s also great for tying hooks in series and for specific rigs that require a hook to be snelled.
The Knotless Knot is popular among carp fishermen because it allows for the attachment of various baits such as boilies to the loop section, also known as a “hair rig.” The rig is extremely effective when tied correctly and has self-hooking properties, which can increase the chances of a successful catch.
The Verdict
And there you have it! The ins and outs of the Knotless Knot, a game-changer in the world of fishing. Its versatility, strength, and ease of tying make it a must-know for any angler, novice or seasoned.
But remember, like any skill, mastering the Knotless Knot takes practice. So, don’t be disheartened if you don’t get it right the first time. Keep at it, and soon you’ll be tying this knot like a pro!
We hope this guide has shed some light on the Knotless Knot and its many benefits. If you’re keen to expand your fishing knowledge further, why not check out our other guides? From understanding different fishing techniques to exploring other useful knots, there’s a wealth of information waiting for you. So, go ahead and dive in. Happy fishing!
 Founder & Angler

 Facebook
 YouTube


